Managing Finances
Lighthouse Training - Module 11
Time estimate: 15 minutes
Topics: Lightbouse, Lib Dem systems and tools, PPERA
Lighthouse is where you can record and submit any donations of £500 and over your local party receives, as well as loans, pledges and election expenses.
We recommend you record all donations, regardless of size, so all areas of the party know who has donated and it allows you to keep better track of your finances.
Managing donations
Step 1
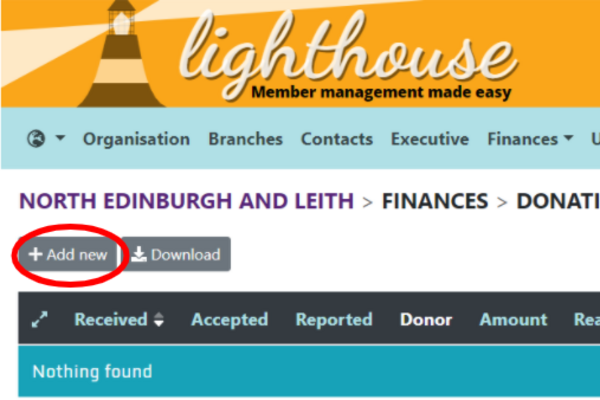
Click on “Finances” on the blue menu at the top; then select “Donations” from the drop-down menu which appears.
Step 2
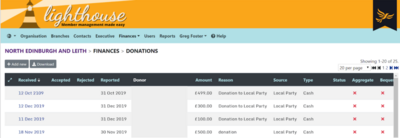
You will be directed to the Donations page. To add a new donation, click “Add new” at the top left of the screen.
Step 3
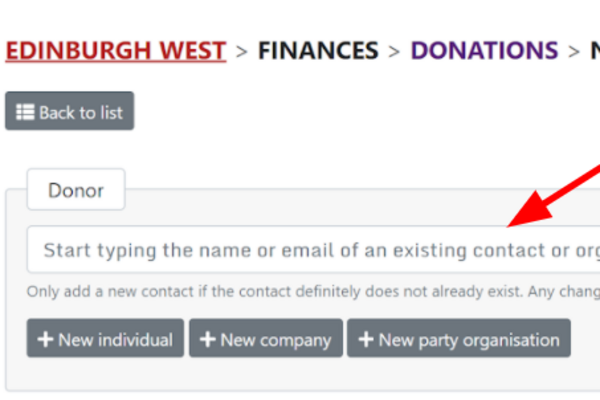
You will be directed to the “New Donation” page. Here you will need to fill in some details to ensure the donation is recorded accurately. To get started, begin typing the name of an individual, company or party organisation in the first field. If they are already a contact in Lighthouse, the name will appear automatically below the “name” field.
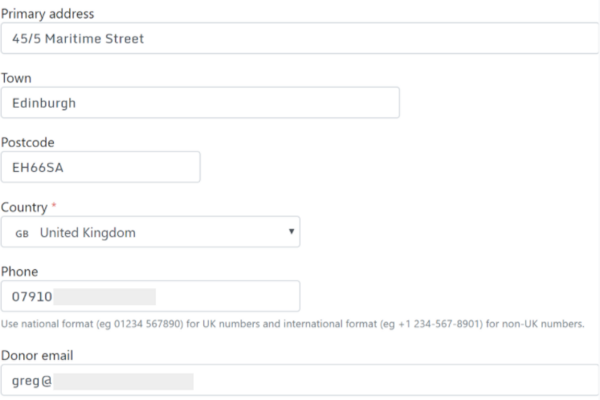
Click on this to choose your donor, and their contact details will be automatically filled in in the fields below. If the donor is not already a contact in Lighthouse, you can click on one of the three buttons below the “name” field to add a new individual, company or party organisation.
Note that you will need contact details for the relevant individual to hand, and, in the case of company donations, the business’ registration number as listed at Companies House.
Step 4
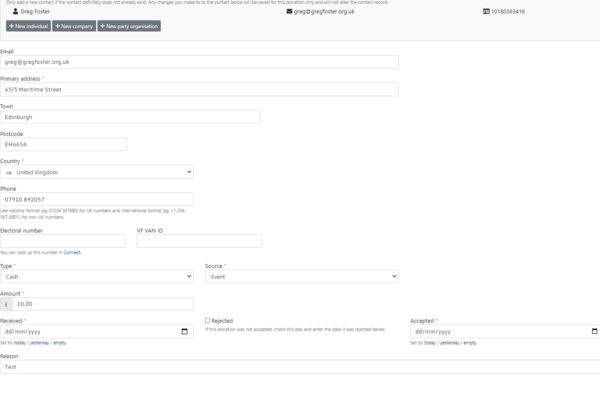
Look up the donor’s electoral number (if applicable) in Connect, then copy and paste it into the “Electoral number” field. You will need the donor's electoral number if they are donating more than £499.
Step 5
You will need to choose the type of donation you received. This is the form the donation took - such as cash, standing order, cheque, bank transfer or gift in kind. For PPERA donations you should select cash, bequest or gift in kind.
Step 6
Next, you will need to choose the source of the donation. This essentially means where the donation has come from, as you will see from the drop-down list that appears for this field. The options are phone, web, post.
Step 7
Input the amount of money - or approximate value in the case of a gift - in the “amount “ field.

Step 8
Your next step is to note the dates the donation was received, whether it was approved or rejected, and when this took place. For “Date received”, simply type in (or choose from the dropdown calendar menu) the date on which the donation was received.
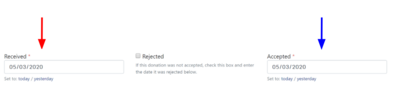
If you wish to accept the donation, type the date it was accepted in the box under “Accepted”. This might vary depending on the type of donation you’ve been given, for example:
- For cash or bank transfers, it will be the same date the donation was received
- For cheque payments, it will be the day that you cash the cheque
- For gifts in kind, it will be the date the gift was used - e.g. date an item was won in a raffle
If you wish to reject the donation, type the date it was accepted in the box under “Rejected”. that whichever date you select for “Date accepted” will also represent the beginning of the 30 day period in which you must verify that the donation is valid.
Step 9
Next, note the reason for the donation. It is really helpful to add a reason because you can use it to look back and see which fundraising efforts were successful.
For example:
- If you received a monetary donation, which appeal or fundraising event generated it? (EG "Local Elections 2021)
- If it was a gift in kind, what was the gift? (EHG: "Stamps")
Finally, if the donation is to be put towards loan repayment, begin typing the name of the loan into the final box on the page. This will allow you to search for and select the name of an existing loan in Lighthouse.
Step 10
When you are finished, click “Save” at the bottom of the screen, or, if you have more donations to record, click “Save and add another”.
You will be returned to the Donations page. Your newly-recorded donation will not appear here straight away, as the system needs to perform a number of automated checks on the donation before displaying it.
Check back in 15 minutes to view your new donation.
Managing loans *optional
This section will cover how to record loans and repayments. We recommend you complete this section if you are the Treasurer, but it is optional for other users.
Adding a new loan
Step 1
Select “Loans” from the drop-down menu.
Step 2
You will be directed to the Loans page, where you can view a list of the loans your local party has taken out. To add a new loan, click “Add new” at the top left of the screen.

Step 3
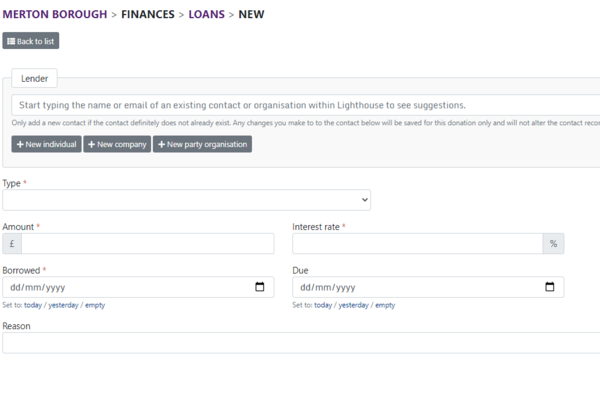
You will be directed to the “New Loan” page. To get started, begin typing the name of an individual, company or party organisation in the first field. If they are already a contact in Lighthouse, the name will appear automatically below the “name” field. Click on this to choose your lender, then fill in their most up-to-date electoral number (for individual donations only), which you can find on Connect.
If the donor is not already a contact in Lighthouse, you can click on one of the three buttons below the “name” field to add a new individual, company or party organisation. Note that you will need contact details for the relevant individual to hand, and, in the case of company loans, the business’ registration number as listed at Companies House.
Step 4
Next, choose the type of loan - credit facility, loan, or overdraft - from the drop-down box.
Step 5
Type the amount of money borrowed in the “Amount” field, and the interest rate in the field next to that. Note that you do not need to type the percentage symbol into this box.
Step 6
Confirm the date of the loan and its due date using the next two fields. You can either do this by typing in the date, or by choosing the correct date from the calendar which appears when you click into one of the date fields.
Step 7
Finally, note the reason for the loan (if applicable) in the last field. Once you are happy that the information you have entered is correct, click “Save” to save your loan, or click “Save and add another” to submit information about another loan. If you clicked “Save”, you will be returned to the Loans page.
Your newly-recorded loan will not appear here straight away, as the system needs to perform a number of automated checks on the loan before displaying it. Check back in 15 minutes to view your new loan.
Adding loan repayments
Step 1
Select “Loans” from the drop-down menu which appears under Finances
Step 2
Choose the loan you would like to record a payment for from the list, and click on the eye icon next to the pencil on the left of the table.
Step 3
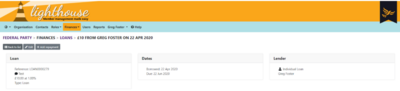
You will be directed to the details page for your chosen loan, where you can see information about the amount borrowed, the lender, its due date and any previous repayments. To record a new repayment, click “Add repayment” at the top-left of the page.
Step 4
Choose the type of repayment you would like to record - a cash repayment, a conversion of a loan to a donation, or a payment of interest added - from the drop-down menu.
Step 5
Select or type in the date of the repayment and the amount being repaid. Note that Lighthouse automatically tells you how much is still owing on the loan, excluding this payment, underneath the “Amount repaid” field.
Step 6
Finally, type in the name of the person who made the repayment in the “Name” field, and any notes you would like to add in the “Details” field. When you are finished, click “Save”, or “Save and add another” if you would like to record another loan repayment.
Step 7
If you clicked “Save”, you will be directed back to the details page for your chosen loan, where the repayment will be noted in the list at the bottom of the page. If you made a mistake in recording a loan repayment, click the pencil icon next to the date of the repayment.
Step 8
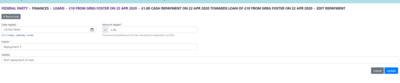
You will be directed to the “Edit repayment” page, where you can change the date of the repayment, the amount repaid, the name of the repayment and any notes in the “Details” field. Note that you cannot change the type of repayment or the name of the person making it after it has been created.
When you are happy with your changes, click “Update”. You will be directed back to the details page for your chosen loan.
Managing pledges
Adding new pledges
Step 1
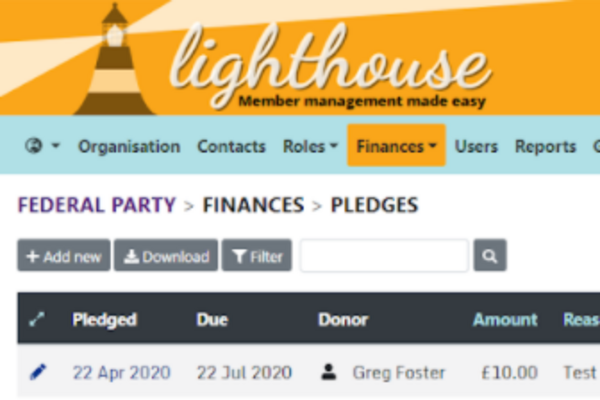
Select “Pledges” from the drop-down menu which appears under Finances.
Step 2
You will be directed to the Pledges page. To record a new pledge, click “Add new” at the top-left of the screen.
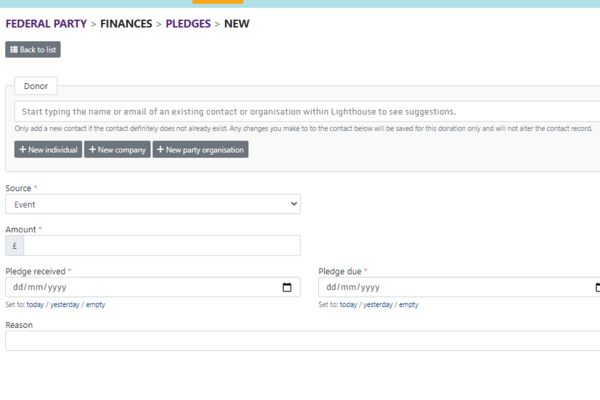
Step 3
You will be directed to the “New pledge” page. To get started, begin typing the name of an individual, company or party organisation in the first field. If they are already a contact in Lighthouse, the name will appear automatically below the “name” field. Click on this to choose your donor, and their contact details will be automatically filled in in the fields below.
If the donor is not already a contact in Lighthouse, you can click on one of the three buttons below the “name” field to add a new individual, company or party organisation.
Note that you will need contact details for the relevant individual to hand, and, in the case of company donations, the business’ registration number as listed at Companies House.
Step 4
If you are recording a pledge from an individual, you will next need to type in their electoral number. You can find this by looking up the contact on Connect.
Step 5
Next, you will need to choose the source of the pledge. This essentially means where the pledge has come from, as you will see from the drop-down list that appears for this field.
Step 6
Next, input the amount of money pledged in the “amount “ field.
Step 7
Your next step is to note the dates the pledge was received, and the date the donor is expected to make the donation. Simply type in (or choose from the drop-down calendar menu) these dates in the “Pledge received” and “Pledge due” fields.
Step 8
Finally, note the reason for the pledge. For example, you could note the appeal or fundraising event which generated it. When you are finished, click “Save”, or “Save and add another” to record another pledge. If you click “Save”, you will be directed back to the Pledges page, where you can view your new pledge in the list.
How to convert pledges to donations
Step 1
Choose the pledge you would like to convert from the list, pledge, then click the eye icon on the left side of the table.
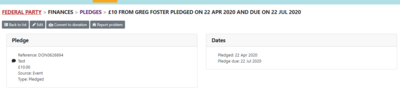
Step 2
You will be directed to the details page for your chosen pledge. To convert it into a donation, click “Convert to donation”.
Step 3
You will be directed to the “Convert to donation” page. Many of the fields on this page will already be completed using the information you recorded about the pledge.
If you need assistance completing the required information, the steps are the same as you would follow to record a new donation.
When you are finished, click “Convert” at the bottom of the page.
Your new donation will be visible on the Donations page, and the pledge will be removed from the Pledge page.
Submitting PPERA
Once you have recorded all your donations for the month, you will need to submit your PPERA returns.
While anyone can help the Treasurer add donations, it is their legal responsibility to submit the PPERA returns, so this must be done by the Treasurer.
Find out more about your PPERA returns here.
If you have any questions regarding what should and should not be included in your PPERA return, then please contact Compliance@libdems.org.uk.
Step 1
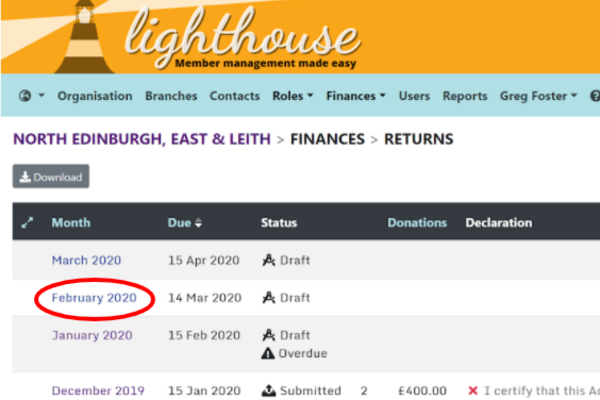
Select ‘donation returns’ in the Finance dropdown.
Step 2
You will be directed to the Returns page, where you will see a list of monthly PPERA returns arranged with the most recent months at the top.
Find the return you need to submit from the list and click on the eye in the left-hand column. Please note that the due date for any month’s return will always be the 15th of the following month, or the nearest preceding working day if this should fall on a weekend or bank holiday.
For example, if completing the March 2020 return, the due date would be 15 April 2020.
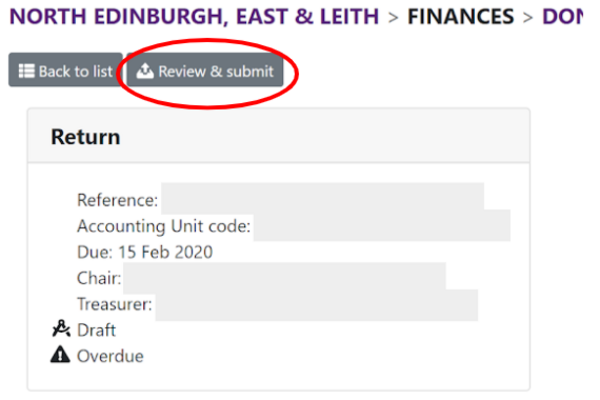
Step 3
You will be directed to a page showing an overview of your chosen month’s return. To start completing the return, click “Review and Submit” on the top left hand side of the page.
Step 4
You will be directed to the page where you can edit and submit your return. First, check that the details of your Chair and Treasurer are correct. If the Chair and Treasurer details are not correct, make sure to click “Change Chair/Convener” or “Change Treasurer”. A pop-up box will appear, into which you can search for and select your new Chair or Treasurer from a list of your existing members, and update their terms of office.
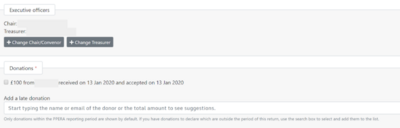
Step 5
You will next see a list of all the donations you logged in Lighthouse over the past month, including details of the amount, the donor, and the date the donation was accepted. Make sure to click the checkbox next to all the donations to include them in your return.
If you have any donations to declare which are outside the period covered by the return, type the name of the donor into the box below the existing donations and select the donation you would like to include.
If you have no donations or they are all below £500, please submit a nil return. To do this go straight to Step 7 and select the first tick-box to confirm a nil return.
Step 6
You will next see a list of all the loans and loan repayments you logged in Lighthouse over the past month. Follow the same process outlined in Step 5 to select the ones you would like to include in your return.
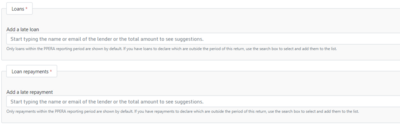
As with donations, you can use the search box to look up loans or loan repayments outside the period covered by the return.
Step 7
Finally, scroll to the bottom of the page and you will see three declarations along with tick-boxes for each one. When you are satisfied that the information and declarations are accurate, click “Submit” at the bottom right hand side of the page.

This will take you to a final confirmation page. Click submit in the corner to submit your returns once you are satisfied the information is correct.
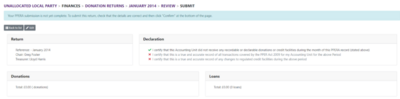
Your status for this return should now be listed as “Submitted”.
Once you have submitted your returns, you won’t be able to make any edits. If you need to, contact Compliance@libdems.org.uk who can help.
Viewing Rebates
Each quarter, your local party receives a share of membership income. This is called rebates. You can also earn Bonus payments for recruiting and retaining members and allow you to earn substantially more than the base rebate, in return for growing the party.
For more information on how rebates are calculated and what you get from them, please visit this page.
Step 1
Click on the Finances tab and then “Rebates”.
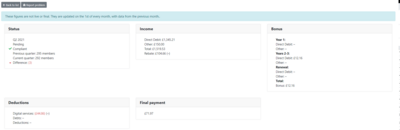
This page shows all of the rebates your local party has received (or is due to receive) since Q2 of 2021.
The page is updated with totals on the 1st of the month each month. It is not live - so please don’t expect it to change day to day.

Viewing historic rebates
Step 1
Click on the Finances tab and then “Rebates”.
Step 2
Click on the drop down menu and select “Historic”
You are now viewing historic rebates.
Reporting problems or printing rebate statements
Step 1
Click on the Finances tab and then “Rebates”.
Step 2
Click on the eye icon on the rebate you wish to inspect further.
Step 3
This should load a rebate record. This displays the rebate in a full page view and is a little easier to use.
You also have the “Report Problem” button in the Action bar, if you need to raise an issue with a rebate with HQ. For more information on reporting problems please see module 14.
Tasks
Tasks are quick and easy things you can do after each module to help practice what you've learned. Try them out and see if they help!
|